It is always a good practice to back up your website content and database before making any modification to the website. In this article, I will explain how to make a backup of source code and database using Cpanel.
Background
Let’s say you have a WordPress website. As you might know by now WordPress core, templates and plugins regularly update their source code to fix security vulnerabilities and add new features. The chances are high that one of the updates goes wrong and in result your whole website breaks. If this happens and you don’t have a recent backup you are in a big trouble as the fixing and recovery requires a professional programmer familiar with WordPress.
GIT
Git is a version control system that allows the software engineer to track changes in the software source code. Proper usage of Git repositories allows software engineer to store a history of all changes to the code. In case of disaster software engineer can use the Git repository to restore to last stable version of the software. If you are using a Git repository to for your code you don’t need to back up your source code. However, you still need to backup your database.
Backup all files using Filemanager
If you are not using a GIT repository you must back up all of your website files before making any major changes to source code such as updates or new additions. One way for backing up all files is using FTP. Using an FTP client like FileZilla you can select all the files in public_html or www directory and transfer them to your computer. However, this process is very slow and time-consuming.
Following instructions shows how to back up all the files in the root directory of your site in a few clicks.
- To use CPanel file manager you need to make sure your website is hosted on an Apache machine and has CPanel as control panel software. For testing you can type your website address in web browser address bar following by CPanel. ex: https://www.sadeghian.us/cpanel
- Use the username and password for CPanel to login to CPanel. This username an password is usually the same as your FTP credentials. If you don’t have this credential you can contact your hosting provider an ask them to provide them to you.
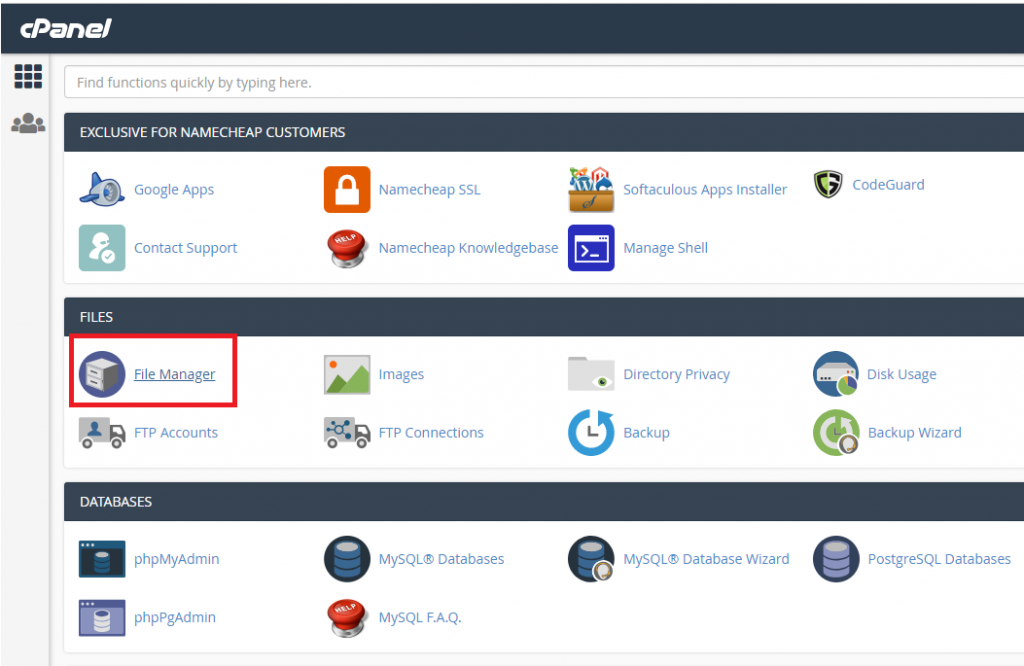
- After login to CPanel click on File Manager icon. Then double-click on public_html or www folder to navigate into it. www is a shortcut to public_html and both point to the same destination.
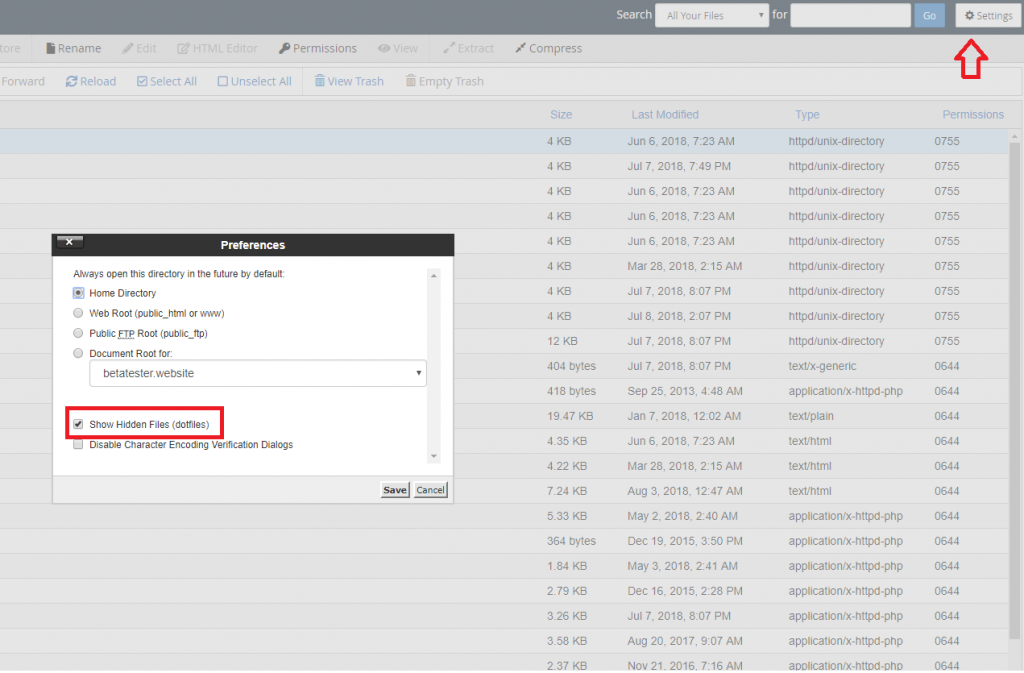
- Click on the settings button on top right of file manager. Then from popup window check the “Show Hidden Files (dotfiles)” checkbox and click on save. This will show the hidden files in the file manager
- Click on “Select All” button then click on “Compress” icon.
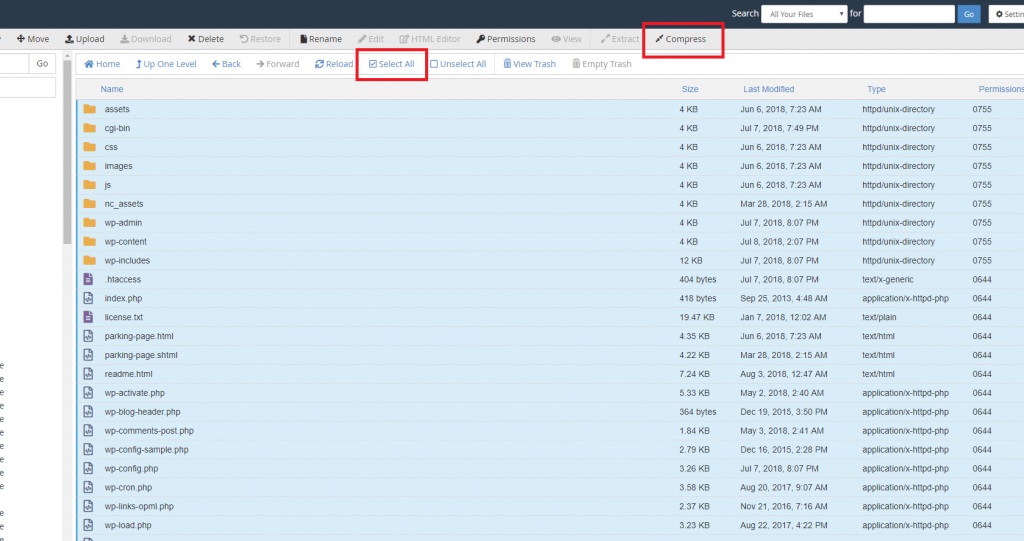
- After clicking on “Compress” a popup will open with options for compression. In this popup select “Zip Archive” and click on “Compress File(s)” button. Then, wait for few minutes until the compression process finish.
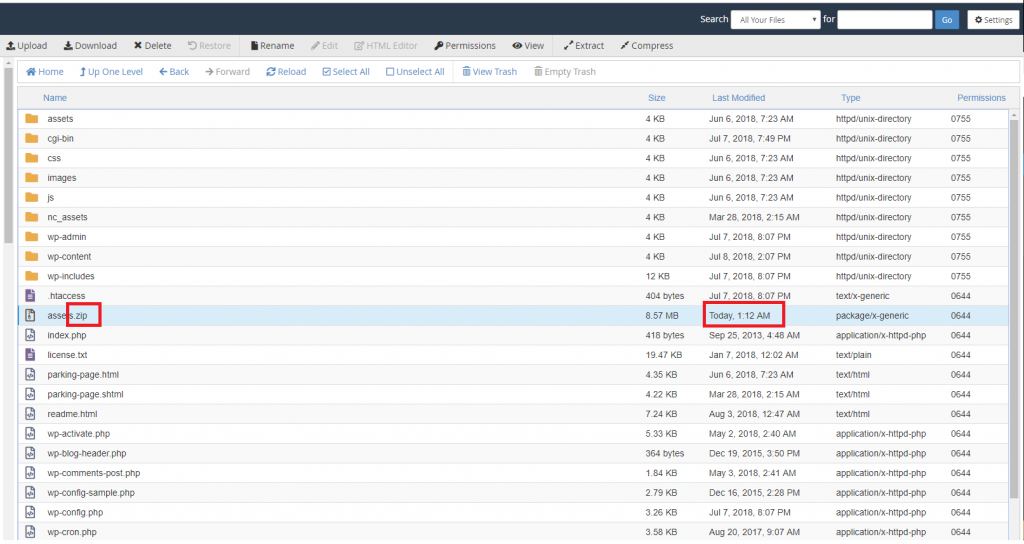
- Next, you need to find the backup file. This might be a little bit tricky as the file name is not predictable. The backup file has a .zip extension and “Last modified” date shows current date and time. After finding the backup file right-click on the file and select “Download” from the menu.
- After downloading the backup file rename it to today date and time and archive it in a safe place on your computer.
Backup the database using PHPMyAmin
- First login to CPanel. You can follow steps 1 and 2 in the previous section(Backup all files using Filemanager) to login to CPanel.
- Click on the phpMyAdmin icon.
- From left sidebar click on the name of the database that you would like to back up. If you would like to back up a WordPress website you can find the name of the current database in use by viewing the code of wp-config.php in the root directory of your web server.
- Next click on “Export” in the top navigation.

- In the next page don’t change any of the options and just click on the “Go” button.
- A file with SQL extension will download to your computer. Rename the file to today date and time and archive it in your computer.